Automated Natural Language Processing (AutoNLP) is a technology that enables users to quickly build dozens or hundreds of AI models without worrying about the very manual tasks of training each model and comparing the model to their labeled data.
There are numerous modeling approaches in NLP and all of them can provide value. Given a labelled data set, it’s not always clear which modeling approach will be the one with the highest accuracy. This problem becomes more complicated when we build hundreds of models to detect different topics, such as sentiment towards a company, discussions around diversity issues at work, problems with customers, and so on… Building a good model for each of these topics requires testing dozens of different approaches.
Dozens of models; dozens of approaches… This requires hundreds, potentially thousands, of variations of experiments to find the best approaches. This is where AutoNLP comes to the rescue.
In this blog, we will learn about what AutoNLP is and implement a sentiment analysis model with twitter dataset.
So What is AutoNLP ?
Using the concepts of AutoML , AutoNLP helps in automating the process of exploratory data analysis like stemming, tokenization, lemmatization etc. It also helps in text processing and picking the best model for the given dataset. AutoNLP was developed under AutoVIML (Automatic Variant Interpretable ML).
Some of the basic features of AutoNLP are
- Use of feature library helps in easy feature engineering and extraction
- Entire dataset can be send to model without manual preprocessing
- Model performance and graphs are produced automatically
Implementation of AutoNLP
We will use the popular twitter sentiment analysis dataset you usually found most of the machine learning blog posts. Without AutoNLP, the data had to be first vectorized, stemmed and lemmatized and finally converted to a word cloud before training. But with AutoNLP, all we have to do is five simple steps.
- Install the autoviml module
- Download the dataset dataset
- Split the dataset
- Pass to the model
- Perform prediction
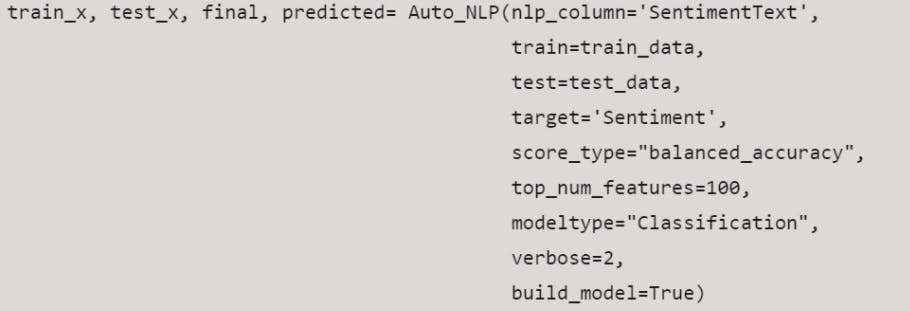
Model Configuration we used for our problem

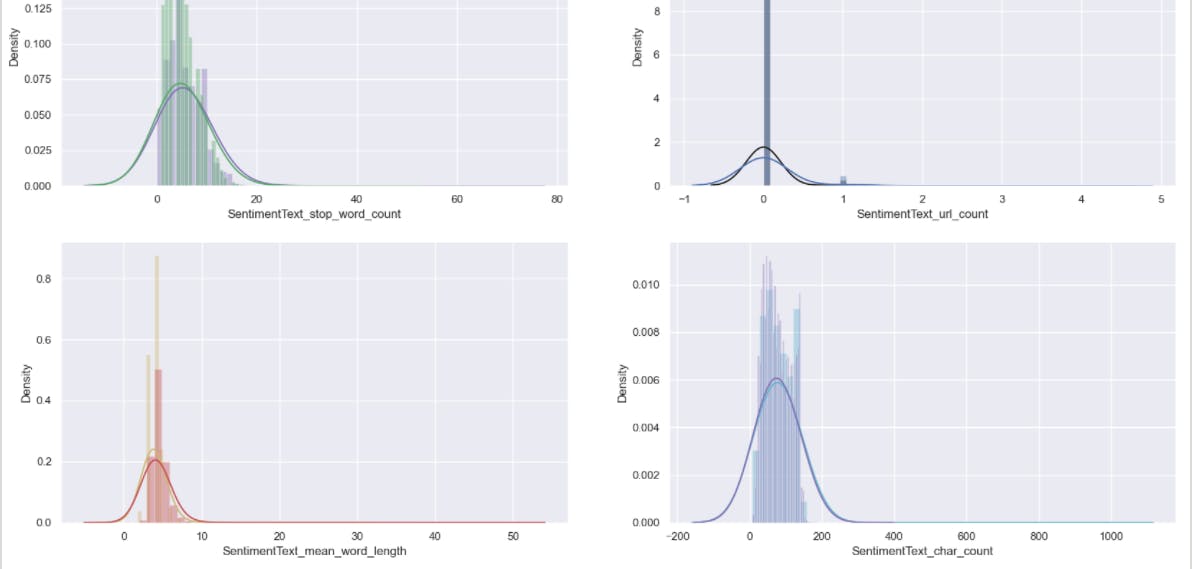
Once you run you can see the bunch of charts auto generated based on the verbosity label.

We can make predictions using final.predict(test_x['SentimentText'])
Few critical points to be aware of while working with AutoNLP
Auto_NLP expects both train and test to be data frames with one NLP column and one target.
It uses the sole NLP_column to analyze, train and predict the target. The predictions train and test are returned. If no target is given, it just analyzes NLP column.
VERY IMPORTANT: CountVectorizer can only deal with one NLP Column at a Time!! SO DONT SEND AN ENTIRE DATAFRAME AND EXPECT IT TO VECTORIZE. IT WILL BLOW UP!
I have selected min_df to be 10% (i.e. 0.1) to select the best features from NLP.
You can make it smaller to return higher number of features and vice versa.
You can use top_num_features (default = 200) to control how many features to add.
The Benefits of AutoNLP
There are numerous benefits of using this approach like
Models get more accurate over time. We can easily retrain models as you provide more data. This means models get more performant over time.
You can build models on a whim. AutoNLP approach makes it easy to build and experiment with models. For instance, we can create smaller labeled data sets, test them on the modeling framework, and see how they work. This can then inform whether we’re labeling the data consistently enough to build a model, and whether we need to label more data to build an acceptable model.
Improve models iteratively
Conclusion
We saw how using AutoNLP made the model building very easy for performing sentiment analysis. Not only this but it also automatically pre-processed the data and gave visualizations for different aspects of the dataset. Thus, automation makes it easy to build even complex models. It meant to be a baseline or challenger solution to your data set. So use it for making quick models that we can compare against or in Hackathons. It is not meant for production!
