


Usually, when we think about data science, we think of how to build and train machine learning models using some data. And after that, the process of model integration to a production environment (a place where model talk to the business system) starts. This process is called “deployment”.
There are multiple ways to deploy a model to production:
Manual: Manually build a web server with a REST API and the model inside of it. Ex: A Flask endpoint that receives the user input via api, process the input with model and send back the model output to user as an api response.
Using instruments: Like TensorFlow Serving. It is a flexible, high-performance serving system for machine learning models, designed for production environments.
Cloud: We could use a cloud service which takes care of launching and scaling of our production model. A good example is AWS SageMaker.
What is Amazon SageMaker?
Amazon SageMaker is a cloud machine-learning platform that enables developers to create, train, and deploy machine-learning models in the cloud. It is a tool designed to support the entire data scientist workflow.
In this article we will create a machine learning model, train with our data and finally deploy it to an EC2 instance.
Create a Notebook Instance
Creating a Sagemaker Notebook instance is simple, just few clicks. The notebook instance is nothing but a Jupyter Notebook runs on AWS.
Go to Sagemaker Service and click on Notebook Instances
Then click on Create Notebook Instance
Feed an unique instance name and an Instance type. By default the type will be ml.t2.medium and most of the cases this instance is sufficient but you can choose based on your requirement.
Then lunch a notebook just like regular Jupyter but here Amazon provides a list of books preloaded with packages. Most common one conda python3.
The Notebook will take some time to get ready and once available it will look like something this.

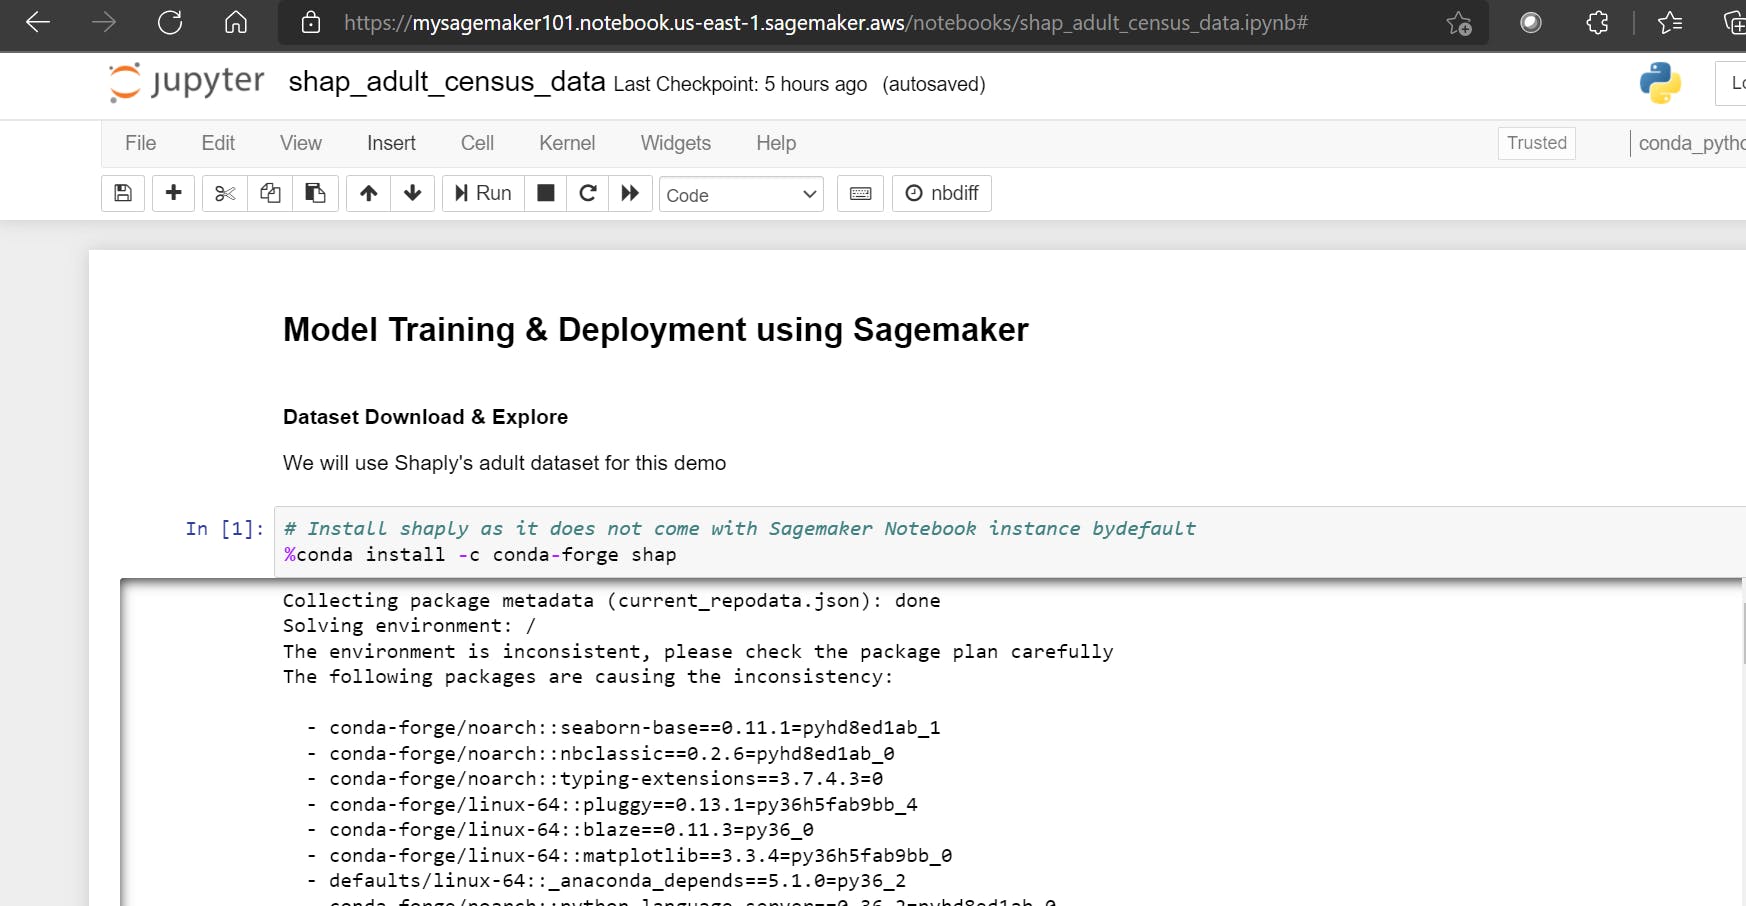
Download & explore the dataset
We will use the SHAP (Shaply Explanation) library’s adult census data for our experiment. Sagemaker does not have this library inbuilt so we need to install it first.
%conda install -c conda-forge shap
We will download and then review dataset and finally upload it to Amazon S3 bucket.

We can get the statically overview of the dataset and draw the histogram of all numeric feature for EDA. The dataset is already well transformed so we don’t need to perform much transformation. We can now split the dataset into Train, Validation and Test using sklearn train_test_split.
We will not load the split data into their respective csv file as xgboost algorithm which we are going to use expects input in that format.
Once csv ready now we have to upload the files into S3 bucket using Sagemaker and boto3 sdk. It will be loaded to the default S3 bucket and then it will be used by a compute optimized sagemaker instance on Amazon EC2 for training. The below block of code sets the default S3 bucket to be used by current Sagemaker session & then it upload the training and validation csv.
import sagemaker
import boto3
import os

bucket= sagemaker.Session().default_bucket()
prefix = "dogs-cats-data"

boto3.Session().resource('s3').Bucket(bucket).Object(
    os.path.join(prefix, 'shap_census_data/train.csv')).upload_file('train.csv')
boto3.Session().resource('s3').Bucket(bucket).Object(
    os.path.join(prefix, 'shap_census_data/validation.csv')).upload_file('validation.csv')
Train the model
To choose the right model for your dataset you may train various suitable models and based on the evaluation result select the appropriate one but for simplicity here we will use the SageMaker inbuilt xgboost as our final model without pre evaluating its performance data.
In SageMaker to train a model we need a model training job and the job expects two important data
AWS Region where Notebook instance running
Sagemaker Execution role name
We can fetch these details like below in Notebook
import sagemaker
region = sagemaker.Session().boto_region_name
print(f"AWS region: {region}")

role = sagemaker.get_execution_role()
print(f"RoleArn: {role}")
Now we have to construct a xgboost estimator and to do that we will call the SageMaker xgboost estimator and pass a list of parameter
from sagemaker.debugger import Rule, rule_configs
from sagemaker.session import TrainingInput

s3_output_location=f"s3://{bucket}/{prefix}/{'xgboost_model'}"

container = sagemaker.image_uris.retrieve('xgboost', region, '1.2-1')
print(container)

# Constructing a sagemaker xgboost estimator
xgb_model=sagemaker.estimator.Estimator(
    image_uri=container,
    role=role,
    instance_count=1,
    instance_type='ml.m4.xlarge',
    volume_size=5,
    output_path=s3_output_location,
    sagemaker_session=sagemaker.Session(),
    rules=[Rule.sagemaker(rule_configs.create_xgboost_report())]
)
- container : Retrieved Estimator
- role : The IAM role
- instance_count : No of EC2 instance SageMaker will create to run the training
- instance_type : EC2 type
- volume_size : SIze of EBS storage of EC2
- output_path : Path to store model artifacts and training results
- sagemaker_session : SageMaker running session going to be used by various AWS resources during the training.
- rules : Report to give us insights about training progress
We can set the hyperparameter for training using the function set_hyperparameter() function.
Once Training over it will generate the Training and Profiling report in S3 which we can download to Notebook current running session and view the details like below. You just need to click o the link to see the report page. It contains information about the training metrices and EC2 resource utilization and bottleneck details.
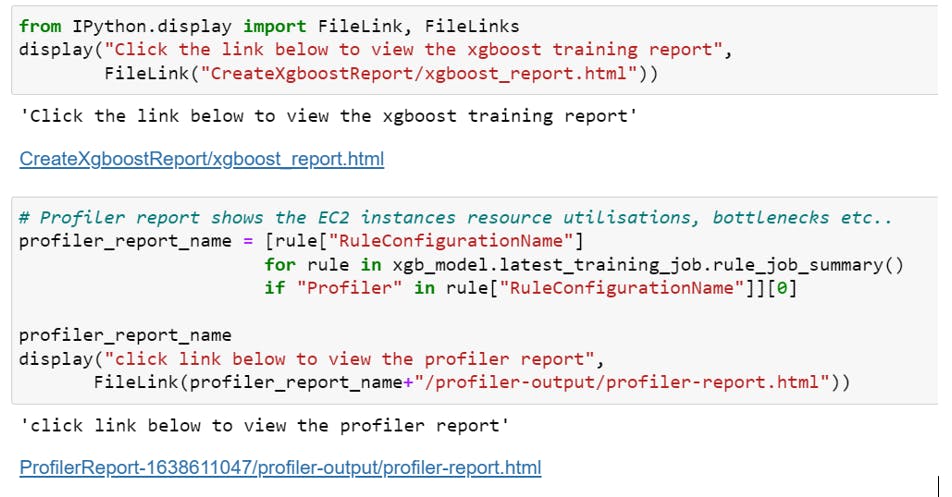
If you would like to read the complete report you can get the PDFs from GitHub.
Deploy the model
Now as our model is ready we can deploy it to an EC2 from here Sagemaker notebook instance. The deployment to an EC2 is very straightforward, we can do so by calling the Deploy() function of the estimator. What the deploy method actually does is it creates a deployable model and configures the SageMaker hosting services endpoint and eventually launches the endpoint to host the model.
from sagemaker.serializers import CSVSerializer
xgb_predictor=xgb_model.deploy(initial_instance_count=1,
                              instance_type='ml.t2.medium',
                              serializer=CSVSerializer())
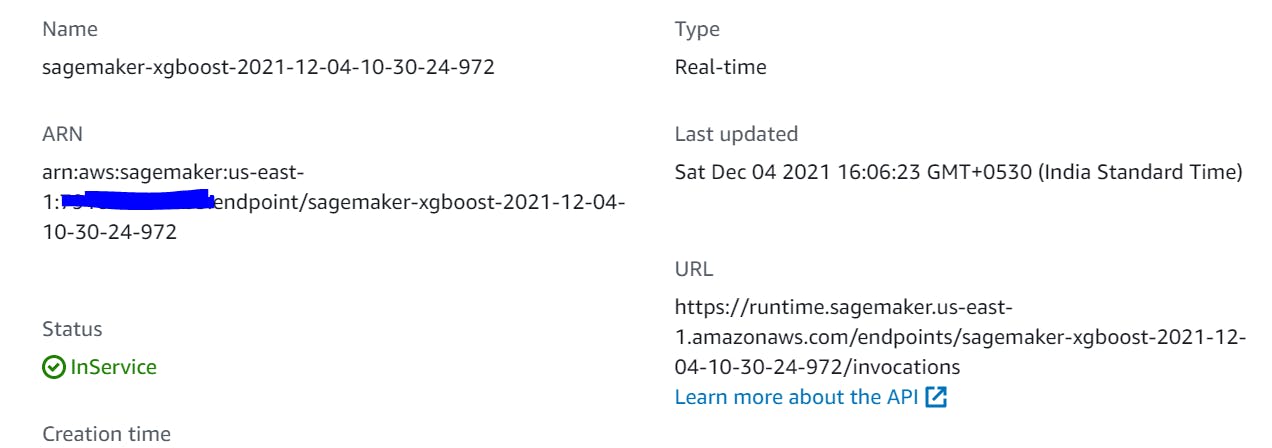
The deployment will take few minutes and once deployed it will create a endpoint which we can retrieve it.

Evaluate the model
Now as we have train and deployed the model using SageMaker we now evaluate its performance based on its predictions on unseen data. To do so we will invoke the model using the endpoint with the test data and will see whether inferences we receive is target accuracy that we want to achieve. The process is same as what we do normally with any machine learning model.
Configuration Snapshots
Here are some Notebook configuration snapshots from the AWS console for reference.
Sagemaker Notebook in action
S3 Bucket:

Bucket Objects created:

Endpoint URL which can be invoked by down the line app:
Model Hosting EC2 instance:

Conclusion
As you can see AWS Sagemaker is a very interesting and useful instrument. It allows deploying ML models quickly and simply. But everything has a cost — using it we lose control and sometimes it is critical and extremely inconvenient. I hope you like the blog. Happy learning!