Dockerizing Node.js: From Local Development to the Cloud with AWS ECS
A detailed visual step-by-step guide.


Welcome to the blog on how to Dockerize a Node.js app and deploy it to AWS ECS! In this post, I'll guide you through the detailed steps with screenshots(that is the only reason the blog looks lengthy) to containerize an app using Docker, push it to a container registry, and then deploy it to Amazon's Elastic Container Service (ECS). We'll cover everything you need to know, from converting a node app to a docker image to configuring your ECS service.
A total of three sections involve
Creating the app
Dockerised the app
Deploy the image to AWS ECS
Prerequisites
Before proceeding make sure your system has the below items ready
You should have Node installed
Docker installed and ready for the run
Access to Docker Hub(Registry)
Access to AWS account
An IDE of your choice
Once all the above is ready we can start with 1st section
Section-1: Creating an application
We can create any web application and run it in a container, mind any web application.
We can not I mean we should not run any desktop app via a container. (While running a desktop application in a Docker container may be possible, it's not always the best approach, especially for applications that require significant user interaction. In these cases, it may be better to run the application directly on the host machine or consider other virtualization options, such as virtual machines.)
so here for the demo, I will create a super simple web app
Create your project folder
Do
npm init -yInstall express by
npm install express –saveCreate a file called index.js
Put the code below
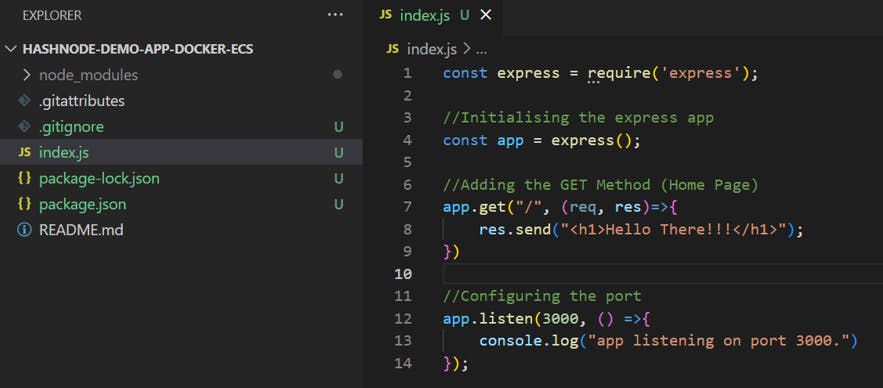
Note: you will not see the extra three files (README, .gitignore and .gitattributes) on your system if you are not using git version control and that is fine.
Once our app is ready we will run it locally first to see if it's working
Go to terminal and from the root directory run the command node index.js

If no error means the code parsed successfully.
Now go to your browser and access the localhost:3000 and if you are getting the below message then your app is working fine and ready for the next stage.

Section-2: Dockerising the app
We saw our app is working fine so we should be good for contenarising it. We know that docker containers are spawned from a docker image so first, we need to convert our app into a docker image.
To do that follow the below steps
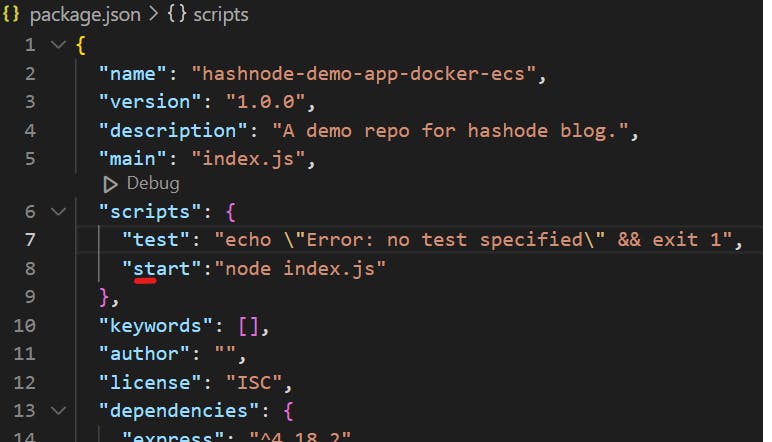
Add the start parameter to the script section of the node app in package.json like below. This will guide the invoking process on how to start our application.
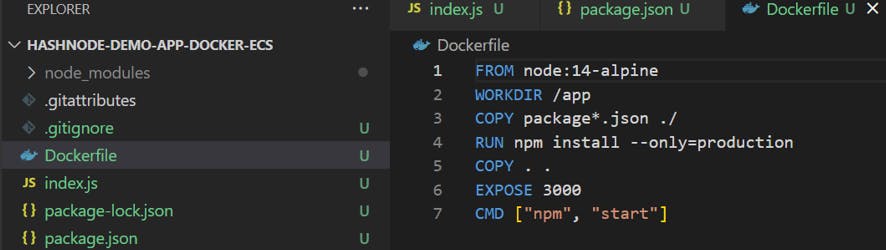
Now create a Dockerfile in your project root directory and put the following code
Now build the the docker image by using below command
docker build -t my-hashnode-demo-app .
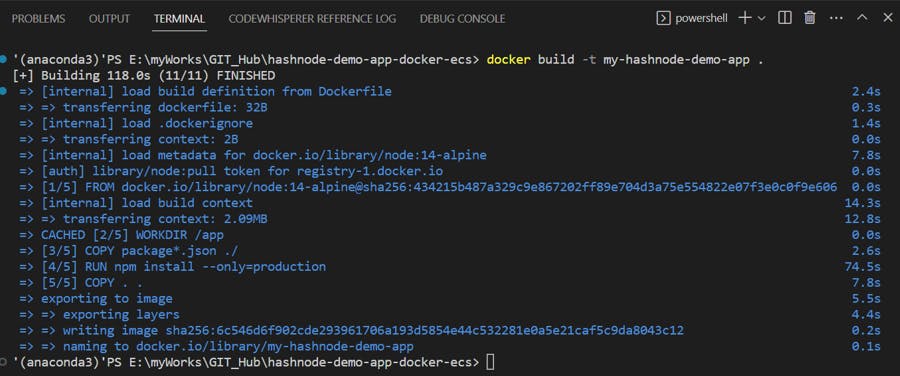
As we can see all the steps declared in the docker file got completed without any error meaning our image got created. We can see our image by running the Docker image command.

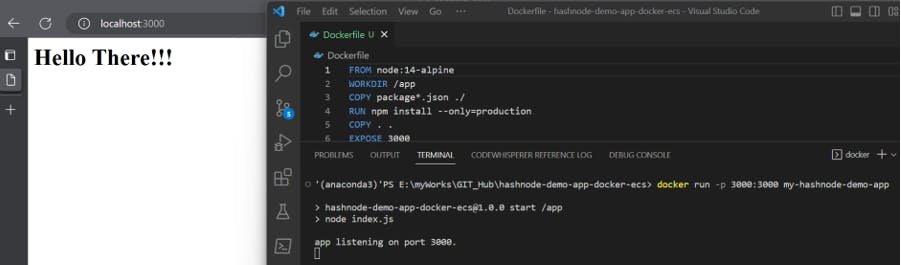
Now test the Docker image locally by running the container with the following command and we should be able to access the same message from localhost:3000 .
docker run -p 3000:3000 my-hashnode-demo-app
We are running the container on port 3000
We can confirm it by looking at the active containers by running docker ps We can verify the container name and associated image.

Now as we have tested our image and it's working fine, it's time to move to the next stage i.e putting the container in AWS ECS but before that, we have to publish our image in the docker registry(hub) so that AWS can access it .
To do that type below commands in terminal
docker login : It will ask for the username and password
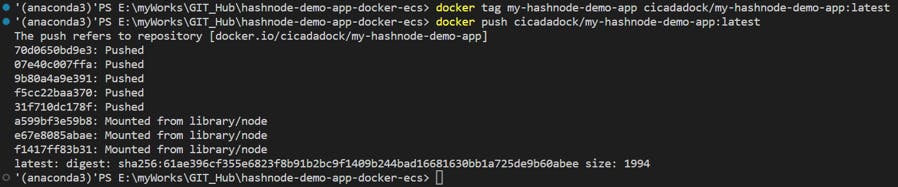
Then run docker tag myimage myusername/myimage:latest
after that docker push myusername/myimage:latest
Note: you just need to replace your username and image name.
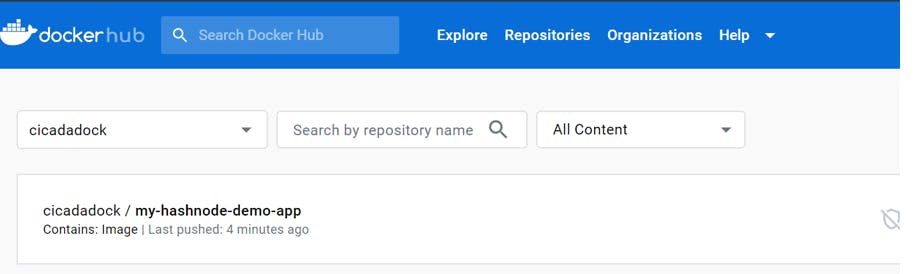
Now we can log in to the docker hub web portal and see our uploaded docker image like below.
Now click on the image and it will be redirected to another page

Click on Public View and you will see the below page
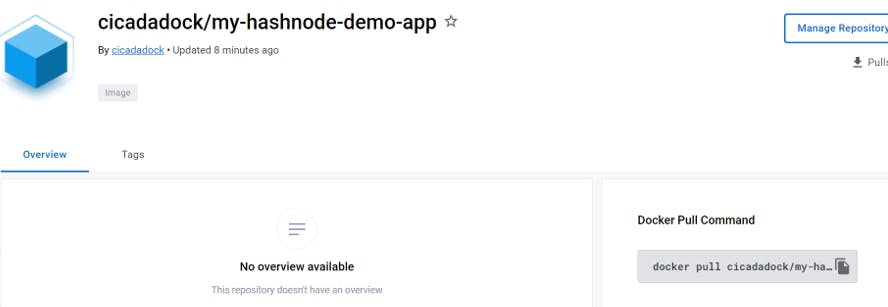
Copy the Docker pull command and put it in a notepad
docker pull cicadadock/my-hashnode-demo-app
we need this image URI in AWS ECS service, hence remove the docker pull part and keep the rest. cicadadock/my-hashnode-demo-app
Now we are ready for the next stage
Section-3: Deploy the app to AWS ECS
Login to your AWS account and open ECS service and click either on clusters or Get started.
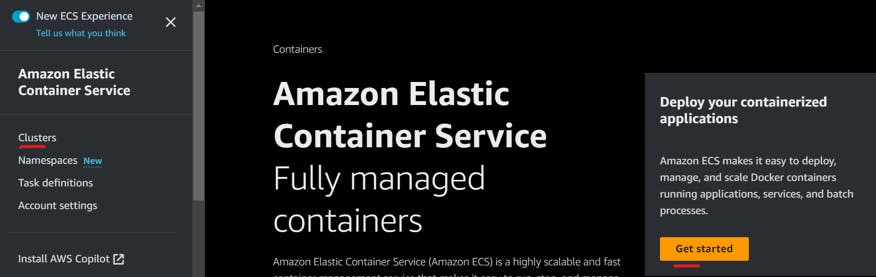
Let's choose Clusters and create a cluster
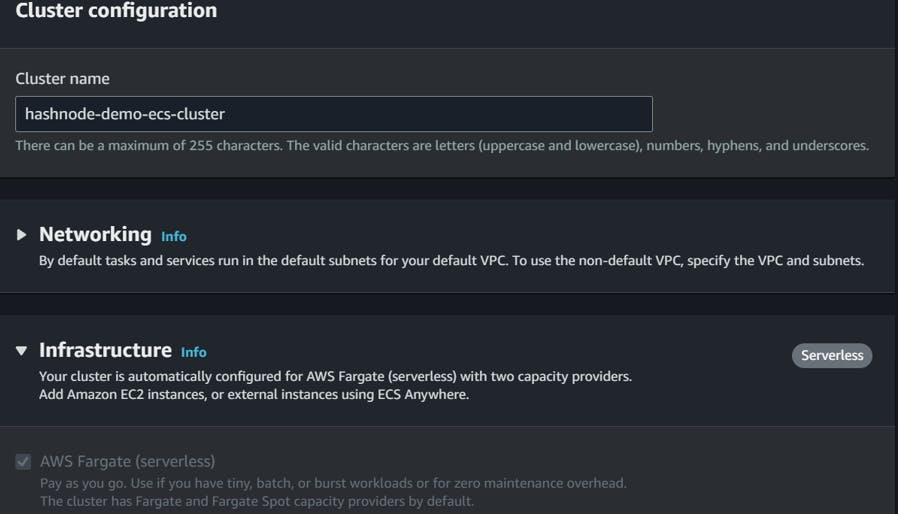
Give a unique cluster name. We can leave rest configurations as default. By default, the cluster will be created with FarGate which ok for us.
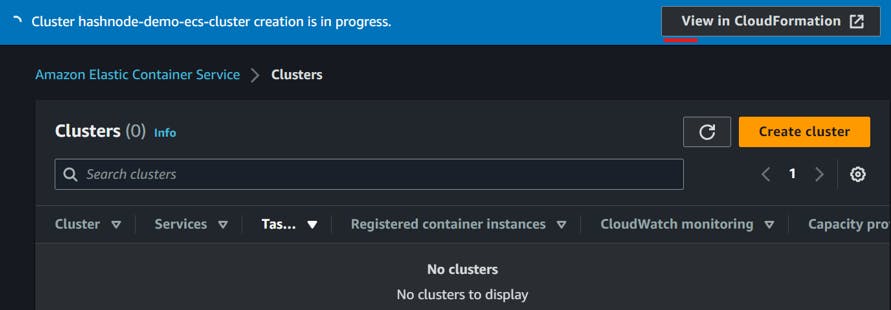
By clicking on create a cluster will start building and we can see the events in cloud formation.
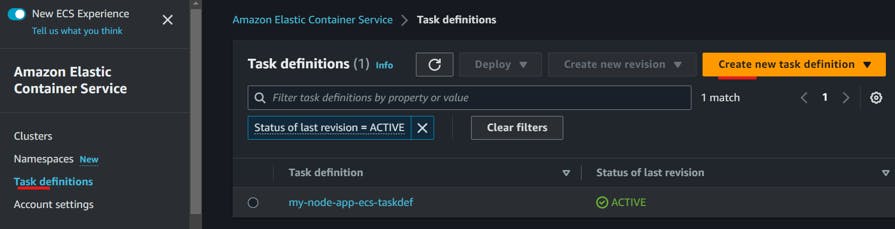
Once the cluster is created, click on the Task definition at the left side bar and then create a new task definition
Fill in the value below. Hndemocon will be the container name when our image runs on the ECS cluster.
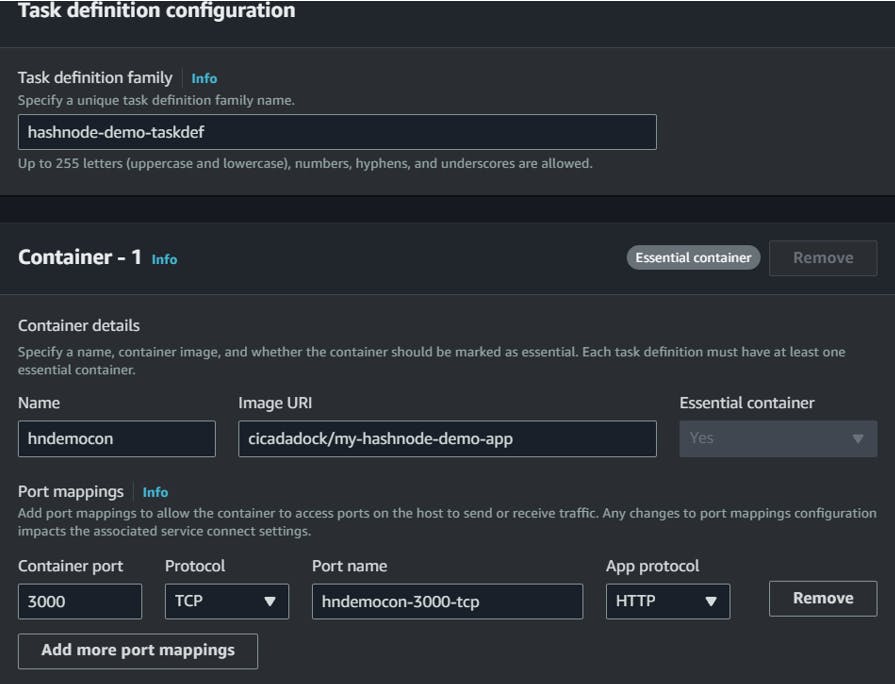
We can leave all other fields as default and click on next

Here also nothing to change. All the default values are good to go. So click Next for review and again Next to create the task definition
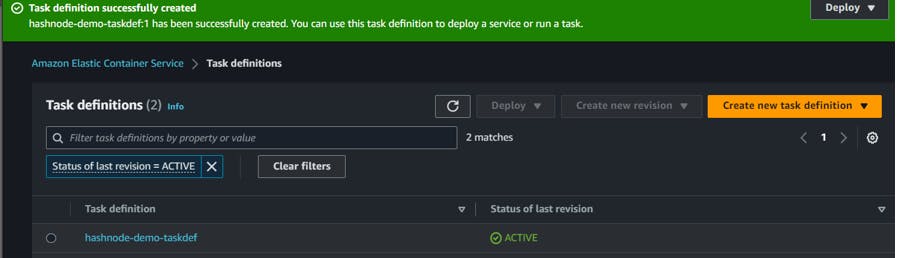
Once it is created successfully, we can see it as active in the console as below
Now go back to the cluster we created and go to the Service and create a service.
We can leave the compute configuration as a default setting and configure the deployment part below
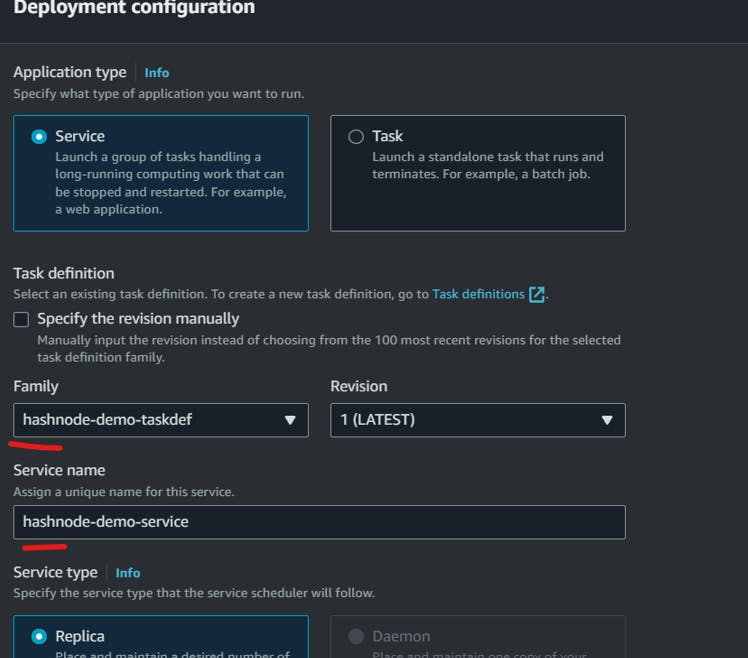
Use the task definition created in the previous step as Family.
Give a unique name to the service and create it. It will take a few seconds to create the server.
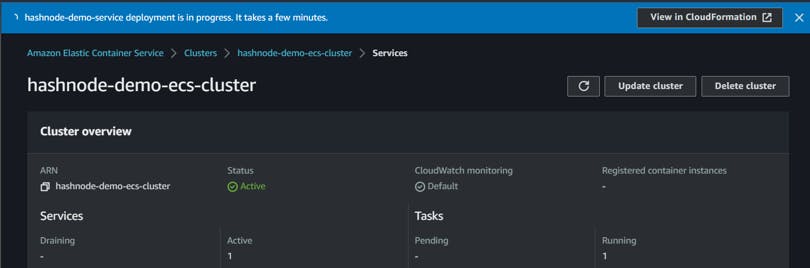
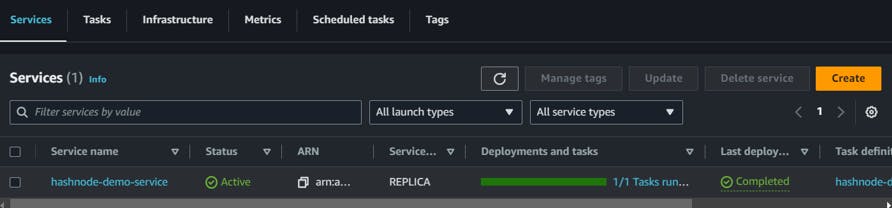
Once the service is created successfully we can see the service status as active and Task deployment completed with green.
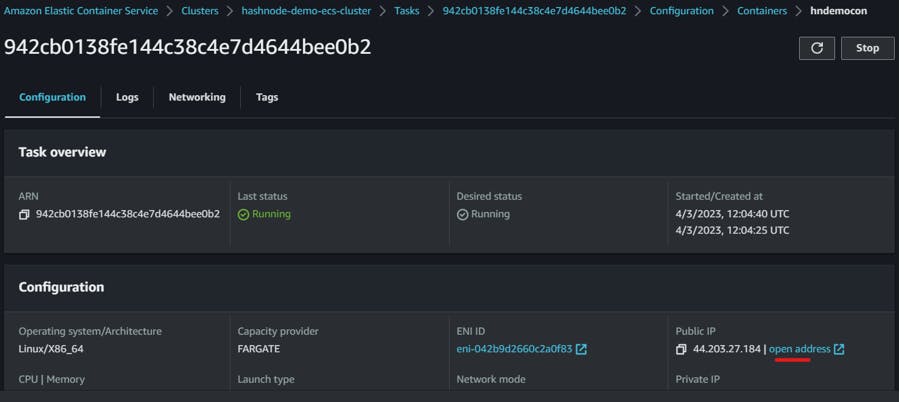
Now go to the Task section and click on the open address and it will launch our web app
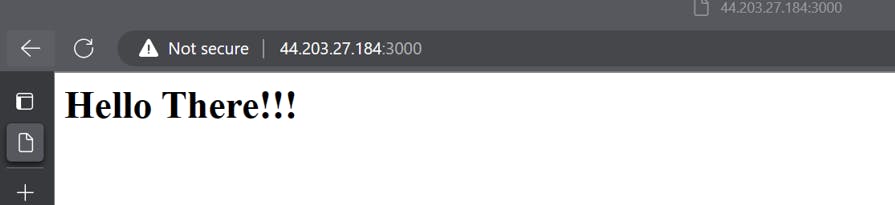
Congratulation, your app is now running on the cloud as a docker container.
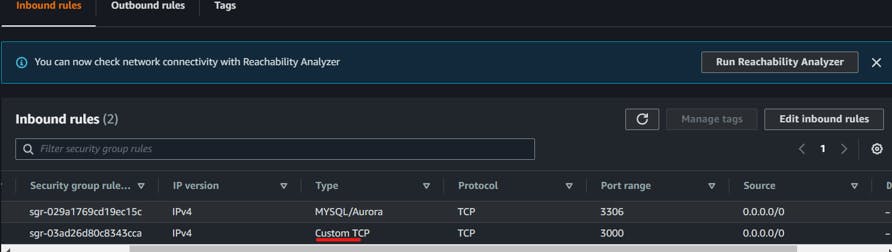
Note: If someone could not access the URL after opening the public ip, please make sure to add a custom TCP port range 3000 with CIDR 0.0.0.0/0 as an inbound rule. Remember for production allowing everything is not acceptable but for the demo it's fine.
You can do that as below.
Go to service >> Networking>>Security group
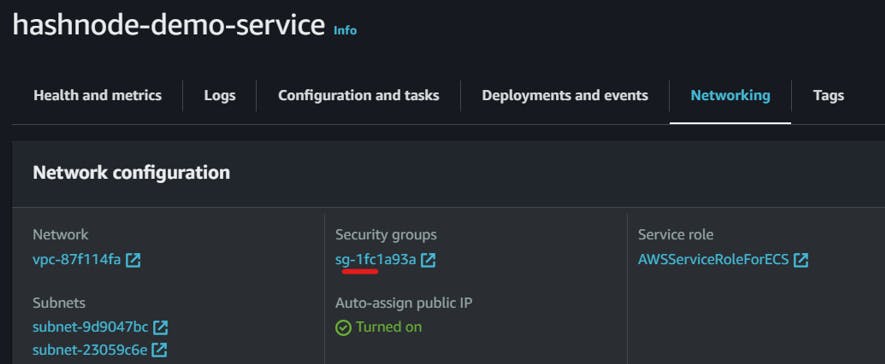
Add the inbound rule.
Cleanup
Once you have completed it, make sure to clean up all these resources so that it will not incur any cost.
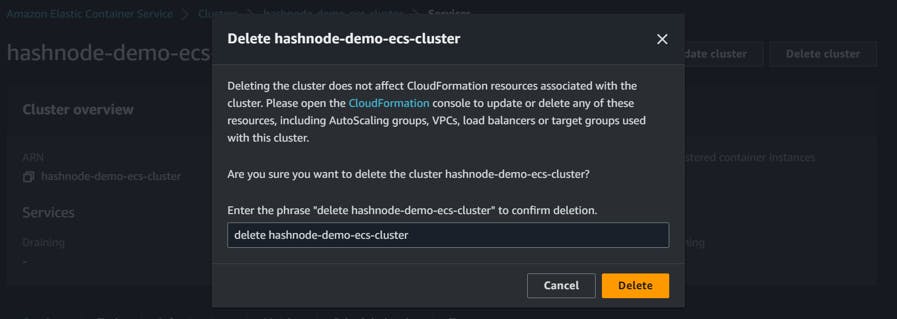
If we try to delete the cluster it would fail because its associated service and Task are in progress. But it would have been great if AWS provided that feature to auto-delete all the resources by deleting the cluster, until then we have to go sequentially.
First, stop the task

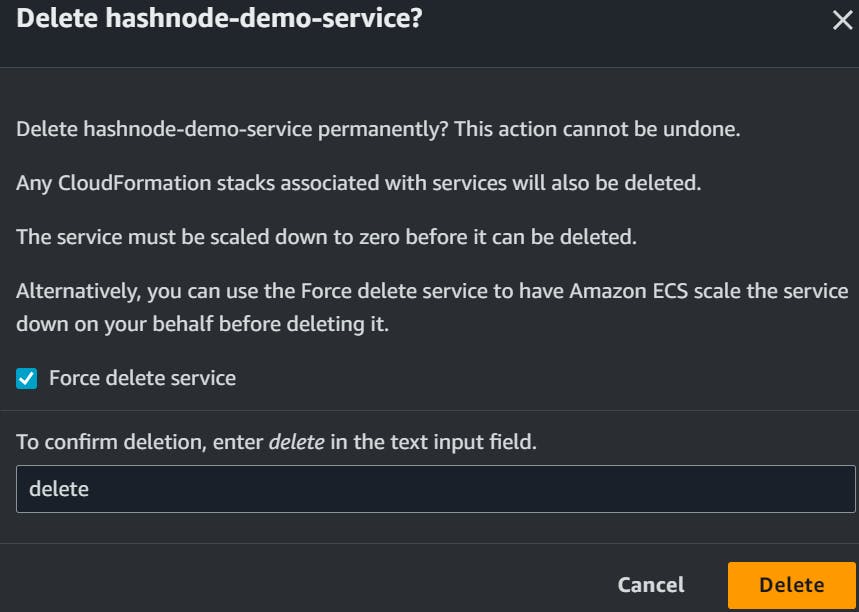
Delete the service
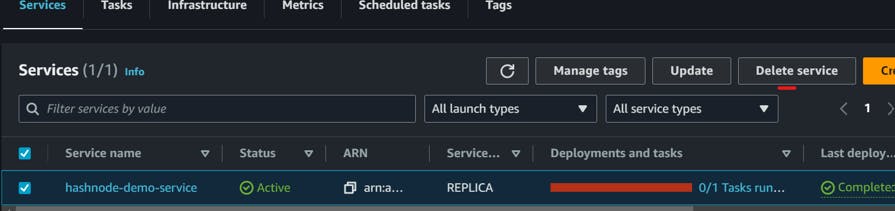
Select Force delete service otherwise it will always create a new task due to replica setup.
Delete the cluster
Conclusion
Dockerizing your Node.js app and deploying it to AWS ECS can be a daunting task, but it doesn't have to be boring. Remember to always keep your sense of humour handy, because sometimes things can get a little crazy in the world of DevOps. As the saying goes, "With great power comes great responsibility, but with Docker, comes great portability." So go forth and Dockerize your apps, but don't forget to enjoy the journey and have a little fun along the way!
You can access the code here. Hope you have enjoyed the blog.
Happy learning!!