Running Lambda Locally
Invoking AWS Lambda functions on your machine using AWS SAM CLI


Many of you come across working on AWS Lambdas and if you are working for any organization creating a lambda and deploying to your company’s AWS account must be through some short of pipeline. The lambda functions are like any programming language functions which can be developed locally on your laptop/desktop using any code editor but if you are using certain AWS specific modules or library then we can not test these functions locally. To test whether your latest change is working or not you have to deploy it first and test it either from AWS console or triggering via API gateway if the lambda integrated with AWS gateway. This process is tedious and inefficient. There are certain AWS services available by using them we can run these AWS services locally. We can simulate the entire AWS setup on local on your laptop before deploying to AWS account. We can use AWS SAM for this. In this blog we will learn how to setup AWS SAM and other prerequisite setup for running a lambda function locally.
What is SAM?
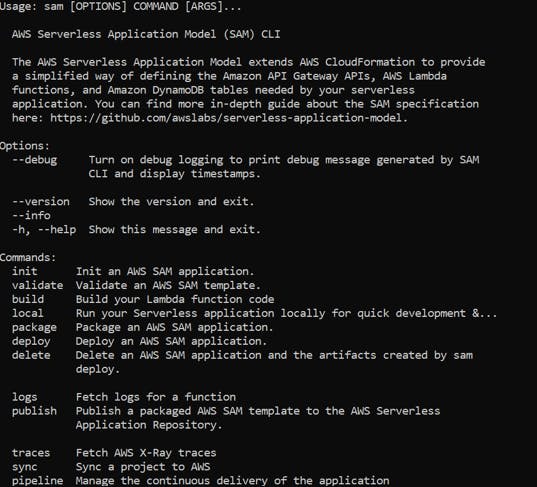
SAM stands for the Serverless Application Model. It is an open-source framework for building serverless applications. To build SAM based applications we have to use SAM CLI. The CLI provides a Lambda-like execution environment that lets you locally build, test, and debug applications defined by SAM templates or through CDK. We can also use it to deploy the app like a CI/CD pipeline.
More read on SAM
Invoking a Lambda function locally
We need to install AWS CLI, AWS SAM CLI and Docker to invoke a Lambda function locally.
Installing AWS CLI
AWS CLI can be installed either downloading windows .msi file (for windows machine) from AWS site or using pip if you have python running on your machine. We need to have at least Python 2.6+ or Python 3.3+ to install AWS CLI.
pip3 install awscli --upgrade –user
Once installed restart the terminal and do a version check to make sure installation was successful.
aws –version
aws-cli/2.2.23 Python/3.8.8 Windows/10 exe/AMD64 prompt/off
Configuring AWS CLI
First, open AWS IAM Users console to retrieve your aws_access_key and aws_secret_access_key. Note that you can download your key value pair only once. If you lose it, you will have to recreate. To configure, include your credentials in your machine namely creating these two files in your root folder: ~/.aws/credentials and ~/.aws/config. First, change directory to .aws by using the command below based on your OS.
C:\> dir "%UserProfile%\.aws"
Credentials
Then, in ~/.aws/credentials, include your aws_access_key and aws_secret_access_key like the following syntax.
[default]
aws_access_key_id=id_value
aws_secret_access_key=key_value
Config
In ~/.aws/config, include AWS configuration options such as region.
[default]
region=us-east-1
output=json
Installing AWS SAM CLI
This installation process varies based on the operating systems. Usually if you are using MAC or any Linux distributions the installation is relative smoother compare to windows but as most of the population uses windows I am trying to demonstrate the steps for SAM setup on a windows machine.
On Windows, you can install AWS SAM CLI using MSI file provided by AWS. Choose the correct MSI file based on your Windows version.
64-bit:
https://github.com/awslabs/aws-sam-cli/releases/latest/download/AWS_SAM_CLI_64_PY3.msi

32-bit:
https://github.com/awslabs/aws-sam-cli/releases/latest/download/AWS_SAM_CLI_32_PY3.msi
Run sam --version to verify that you have successfully installed AWS SAM CLI.
If you run just sam on terminal helpful details will be printed on screen.
Install Docker
Again, this could be a pain in butt while setting up on windows machine but we can make it work with few troubleshooting. Note that docker only needed for running things locally, if we don’t want SAM to run services locally and your purpose is something else like CI/CD then you can avoid installing docker.
To install docker first make sure you have enabled VT(Virtual Technology) option on your BIOS. To enable VT you can refer this link.
Then Install the Docker Desktop on Windows (Choose WSL2 Backend option). It can be downloaded from Docker website.
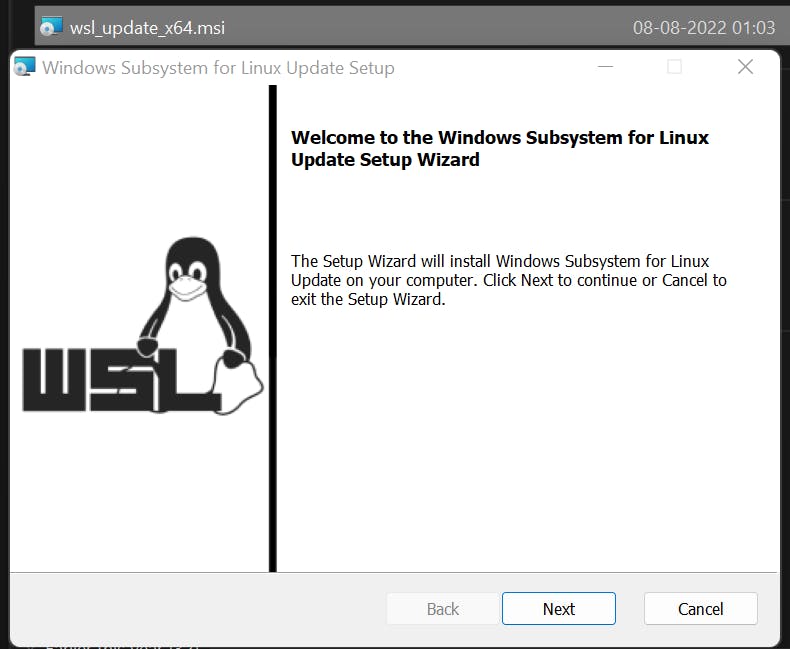
Once Docker Desktop installed go for manually installing WSL service (Windows subsystem for Linux) Refer this here.
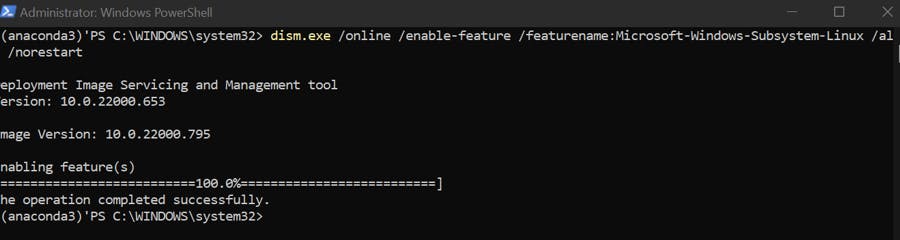
Once installed enable WSL feature
dism.exe /online /enable-feature /featurename:Microsoft-Windows-Subsystem-Linux /all /norestart
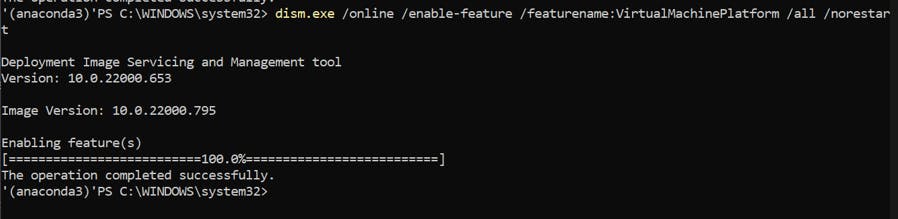
Then enable VT feature
dism.exe /online /enable-feature /featurename:virtualMachinePlatform /all /norestart
Then Download & install the Linux package of your choice from windows Marketplace. Here I am using Ubuntu
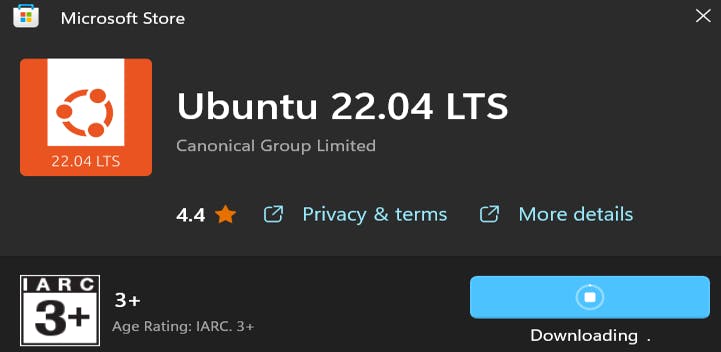
Install Ubuntu
Set WSL2 as default version
wsl - -set-default-version 2

After successful installation restart the Machine and lunch the Docker Desktop
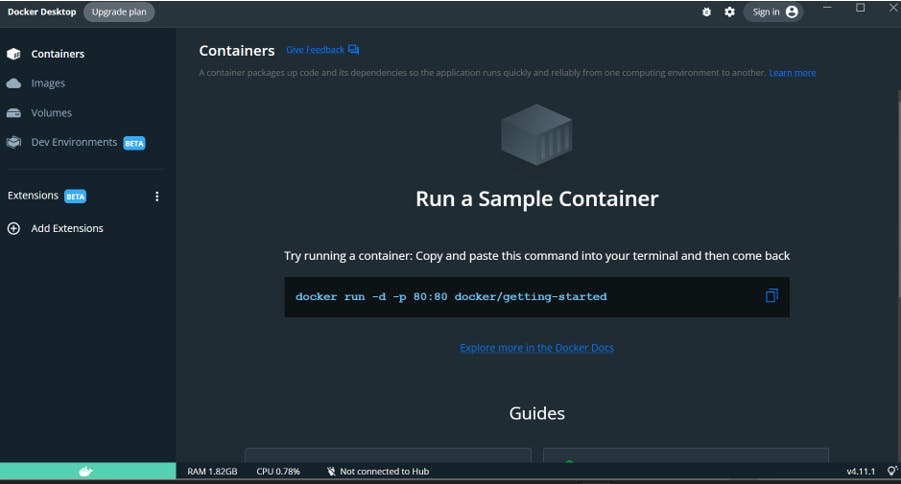
Test a Hello world Container
This is not mandatory, here I am doing to make sure the Docker able to download images and running the container without any issues.
Just copy the command from the Docker Desktop Dashboard and run it on your terminal. It will download an image and run it on a container.
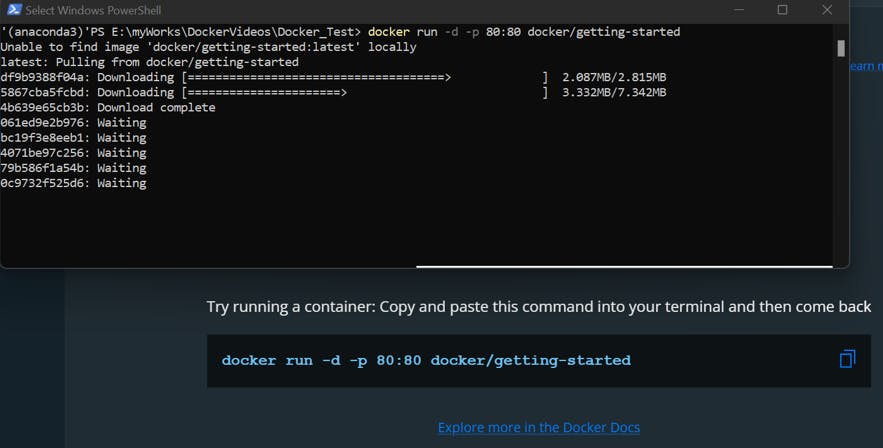
Open the application on browser
Create-Build-Deploy SAM Project
Now our setup is ready for using SAM. Let’s build a hello world SAM project, test it locally and finally deploy it to AWS.
Run below command to create a SAM project
sam init
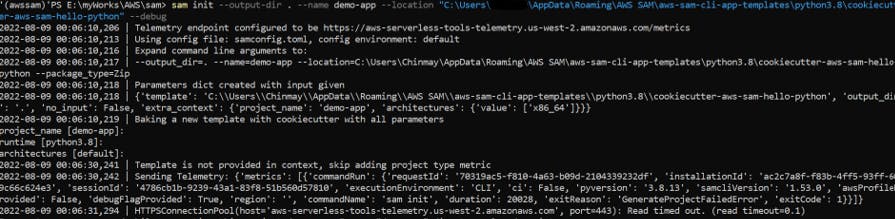
If it did not work and throws the path error on your windows machine then use this command instead
sam init --name lambda-nodejs16.x --location "C:\Users\xxx\AppData\Roaming\AWS SAM\aws-sam-cli-app-templates\nodejs16.x-image\cookiecutter-aws-sam-hello-nodejs-lambda-image"]
NOTE: The above command is specific to the project we want to select for initialization. Here I am creating a hello world Node.js based lambda. For you the template name will be different based on your selection.
Once project created, open the project folder and will see below files
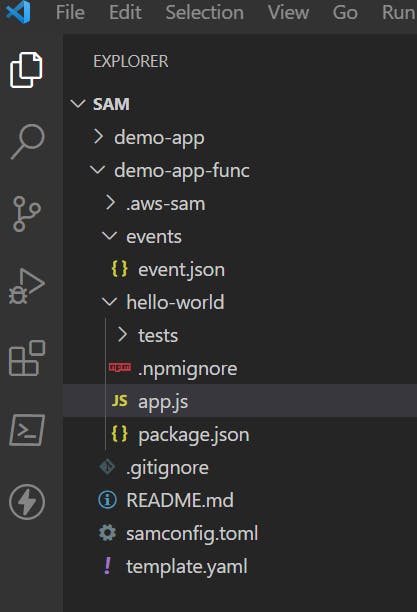
template.yaml file contains the resource declarations. It defines what resource to be used and how. Its our infrastructure as code.
app.js: This is the file where you write your lambda codes
event.json : Here you need to declare the lambda event content.
Running Lambda Locally
Go to the project root folder
run invoke command
sam local invoke
To run with custom event data
sam local invoke -e ./events/events.json
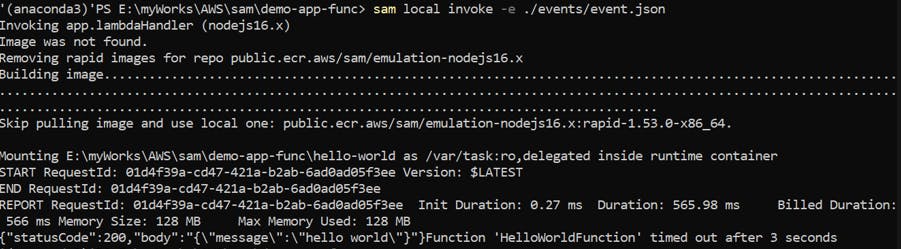
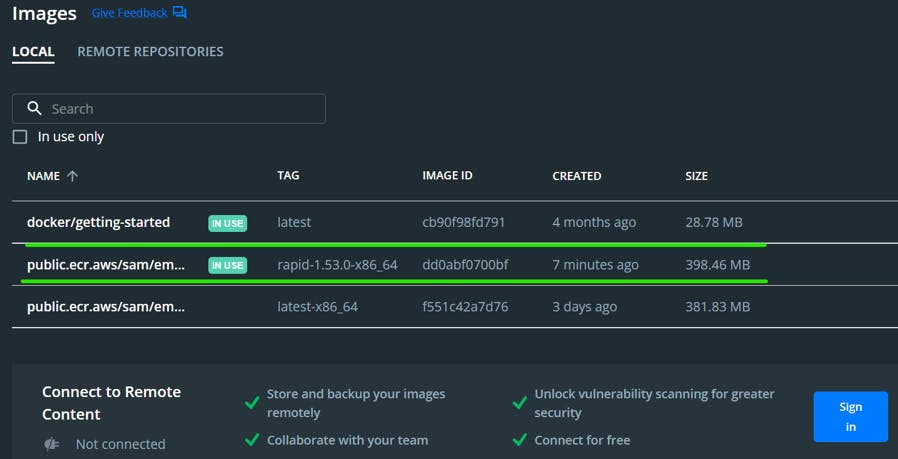
You will get timeout if your container is not running like here. Lets first run the container in Docker dashboard and rerun the sam command. To run the container go to the Docker Dashboard images section and we can see the latest images for node.js downloaded. Start the image. Its status should get change to in use like below.
Now if we rerun the sam command it should work fine now
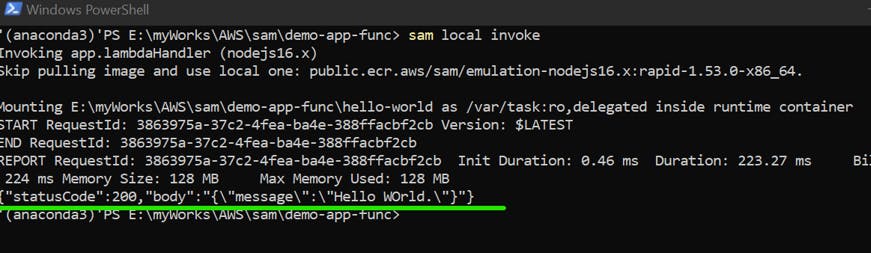
This time it will skip image build as its already been downloaded in previous attempt.
We can made changes to lambda and to test we just need to run invoke local command.
Deploy the Lambda
Run the build command
sam build
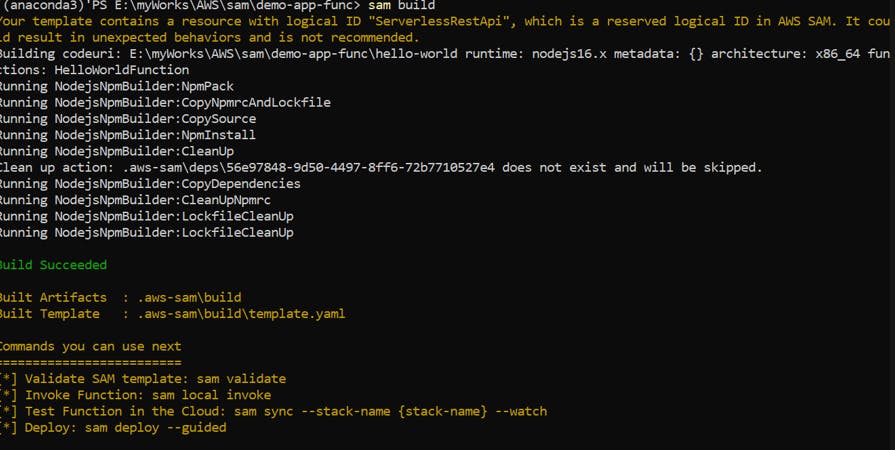
We can also validate the template before build/deploy

Now Deploy the build artifact
sam deploy --guided
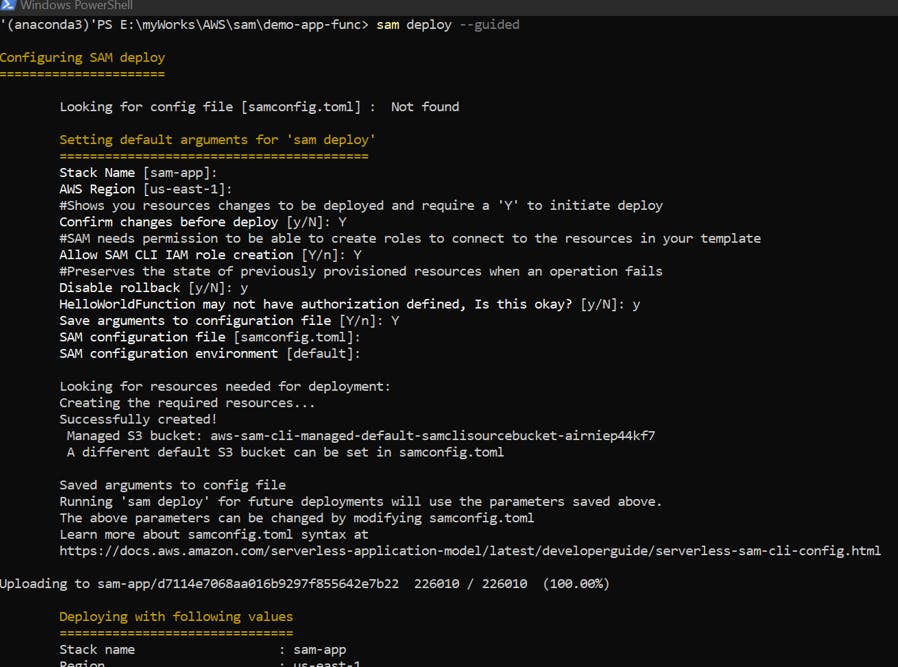

We can see the stack got created in console

Code Synching
This is one of may favourite SAM offering apart form SAM local. We can make changes to code locally and SAM will synch the code changes to aws account. Lets see how it worked
Let make some changed to code (Body message changed) and run the sync command
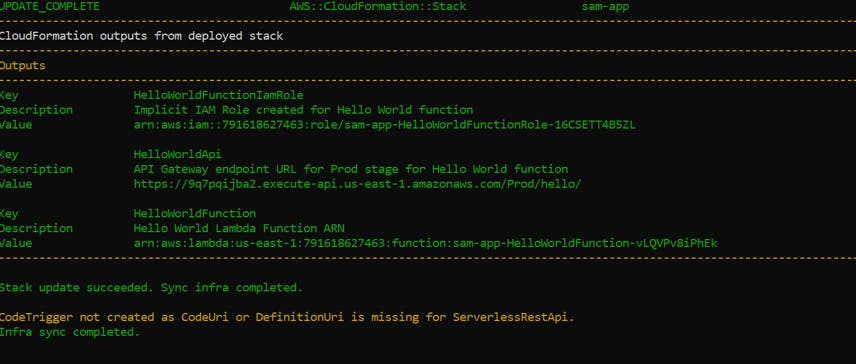
sam sync --stack-name sam-app --watch
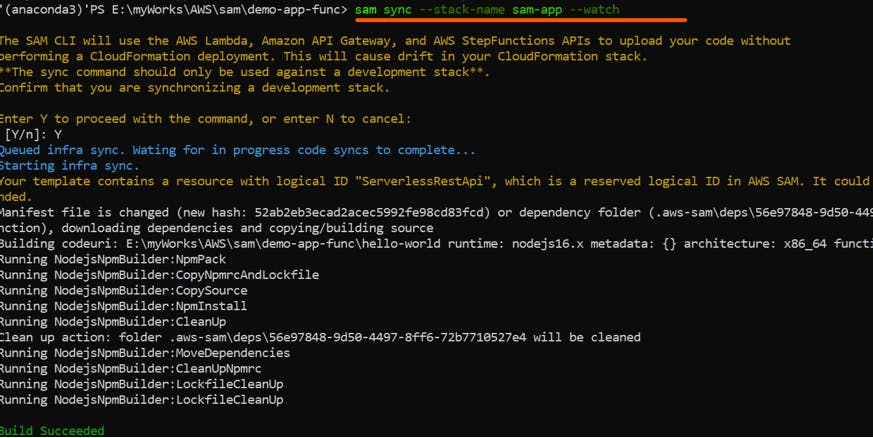
NOTE: SAM will not use CloudFormation deployment for sync build but we can see the drift in the stack.
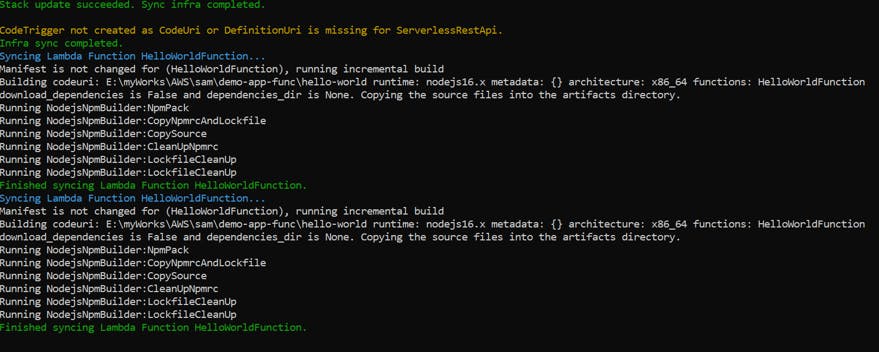
If you again make some code changes it will synch automatically again. For demo made some changes to lambda body and we can see below its automatically triggers incremental build process
Cleanup
Clean up process is same. The deployed stack can be deleted either from console or using AWS CLI.
aws cloudformation delete-stack --stack-name sam-app
Conclusion
I know the blog get lengthy but I wanted to show each step with output messages including the troubleshooting ones so that there will be no confusion when you try it on your own machine.
So in this blog we have tried to understand the basics of AWS SAM , we have configured it on a windows machine then we created a basic SAM application, ran it locally and finally deployed it to the AWS account. The SAM can do a lot of other stuffs apart from simulating AWS resources locally. I would suggest to refer the AWS documents to understands the SAM services more deeply. What we did here is just scratched the surface.
Hope you have liked the blog. Happy learning!!